本文将教你如何为在 Kubernetes 上运行的 Spring Boot 应用程序配置 SSL 证书的热重载。
译自 Spring Boot SSL Hot Reload on Kubernetes,作者 piotr.minkowski 。
本文将教你如何为在 Kubernetes 上运行的 Spring Boot 应用程序配置 SSL 证书的热重载。我们将使用 Spring Boot 框架的 3.1 和 3.2 版本引入的两个功能。第一个功能允许我们利用 SSL 绑定来配置和使用自定义 SSL 信任材料,既可以在服务器端也可以在客户端使用。第二个功能使得在 Spring Boot 应用程序中的嵌入式 Web 服务器中热重载 SSL 证书和密钥变得很容易。让我们看看它在实践中是如何工作的!
为了在 Kubernetes 上生成 SSL 证书,我们将使用 cert-manager。"Cert-manager" 可以在指定的时间后轮换证书,并将其保存为 Kubernetes Secrets。我已经在这篇文章中描述了如何实现类似的场景,即在 Secret 更新后自动重新启动 pod。我们曾经使用 Stakater Reloader 工具,在 Secret 的新版本上自动重新启动 pod。然而,这一次我们使用 Spring Boot 的功能来避免重新启动应用程序(pod)。
如果您想要自己尝试这个练习,您可以随时查看我的源代码。为了做到这一点,您需要克隆我的 GitHub 存储库。然后切换到 ssl 目录。您会找到两个 Spring Boot 应用程序:secure-callme-bundle 和 secure-caller-bundle。之后,您只需要按照我的说明操作。让我们开始吧。
在我们深入技术细节之前,让我多写一点关于我们解决方案的架构。我们的挑战非常普遍。我们需要为在 Kubernetes 上运行的服务之间启用 SSL/TLS 通信设计一个解决方案。这个解决方案必须考虑到证书重新加载的场景。此外,它必须同时发生在服务器端和客户端,以避免通信中的错误。在服务器端,我们使用嵌入式 Tomcat 服务器。在客户端应用程序中,我们使用 Spring RestTemplate 对象。
"Cert-manager" 可以根据提供的 CRD 对象自动生成证书。它确保证书有效且最新,并在到期前尝试更新证书。它作为 Kubernetes Secret 提供了所有所需的员工。这样的秘密然后被挂载为一个卷到应用程序 pod 中。由于这样,我们不需要重新启动一个 pod,就可以在 pod 内看到最新的证书或“密钥库”。这是描述的架构的可视化。

为了在 Kubernetes 上安装 "cert-manager",我们将使用它的 Helm Chart。我们不需要任何特定的设置。在安装Chart之前,我们必须为最新版本 1.14.2 添加 CRD 资源:
$ kubectl apply -f https://github.com/cert-manager/cert-manager/releases/download/v1.14.2/cert-manager.crds.yaml然后,我们需要添加 jetstack Chart仓库:
$ helm repo add jetstack https://charts.jetstack.io之后,我们可以使用以下命令在 cert-manager 命名空间中安装Chart:
$ helm install my-release cert-manager jetstack/cert-manager \ -n cert-manager为了验证安装是否成功,我们可以显示运行中的 pod 列表:
$ kubectl get po
NAME READY STATUS RESTARTS AGE
my-cert-manager-578884c6cf-f9ppt 1/1 Running 0 1m
my-cert-manager-cainjector-55d4cd4bb6-6mgjd 1/1 Running 0 1m
my-cert-manager-webhook-5c68bf9c8d-nz7sd 1/1 Running 0
除了标准的 "cert-manager",您还可以将其安装为 "csi-driver"。它为 Kubernetes 实现了容器存储接口(CSI),并与 "cert-manager" 一起工作。挂载此类卷的 pod 将请求创建证书,而不是创建 Certificate 资源。这些证书将直接挂载到 pod 中,没有中间的 Kubernetes "Secret"。
就是这样。现在我们可以继续实施了。
我们的第一个应用程序 secure-callme-bundle 在 HTTP 上公开了一个单一的端点 GET /callme。该端点将由 secure-caller-bundle 应用程序调用。下面是 @RestController 的实现:
@RestController
public class SecureCallmeController {

    @GetMapping("/callme")
    public String call() {
        return "I'm `secure-callme`!";
    }

}
现在,我们的主要目标是为该应用启用 HTTPS,并使其在 Kubernetes 上正常工作。首先,我们应该将 Spring Boot 应用的默认服务器端口更改为 8443(1)。从 Spring Boot 3.1 开始,我们可以使用 spring.ssl.bundle.* 属性来配置 Web 服务器的 SSL 信任材料,而不是使用 server.ssl.* 属性(3)。它可以支持两种类型的受信任材料。为了使用 Java 密钥库文件配置包,我们必须使用 spring.ssl.bundle.jks 组。另一方面,也可以使用 PEM 编码的文本文件配置包,使用 spring.ssl.bundle.pem 属性组。
在本练习中,我们将使用 Java 密钥库文件(JKS)。我们在服务器名称下定义了一个单独的 SSL 包。它包含密钥库和信任库的位置。通过 reload-on-update 属性,我们可以指示 Spring Boot 在后台监视文件,并在文件更改时触发 Web 服务器重新加载。此外,我们将使用 server.ssl.client-auth 属性强制验证客户端的证书(2)。最后,需要使用 server.ssl.bundle 属性为 Web 服务器设置包的名称。以下是我们的 Spring Boot 应用程序在 application.yml 文件中的完整配置。
# (1)
server.port: 8443

# (2)
server.ssl:
  client-auth: NEED
  bundle: server

# (3)
---
spring.config.activate.on-profile: prod
spring.ssl.bundle.jks:
  server:
    reload-on-update: true
    keystore:
      location: ${CERT_PATH}/keystore.jks
      password: ${PASSWORD}
      type: JKS
    truststore:
      location: ${CERT_PATH}/truststore.jks
      password: ${PASSWORD}
type: JKS在我们将 callme-secure-bundle 应用部署到 Kubernetes 上之前,我们需要配置 "cert-manager" 并生成所需的证书。首先,我们需要定义负责发放证书的 CRD 对象。这是生成自签名证书的 ClusterIssuer 对象。
apiVersion: cert-manager.io/v1
kind: ClusterIssuer
metadata:
  name: ss-cluster-issuer
spec:
  selfSigned: {}
这是用于保护生成的密钥库的密码的 Kubernetes Secret:
secure-callme-bundle/k8s/secret.yaml
kind: Secret
apiVersion: v1
metadata:
  name: jks-password-secret
data:
  password: MTIzNDU2
type: Opaque
然后,我们可以生成证书。这是用于应用程序的 Certificate 对象。这里有一些重要的事情。首先,我们可以一起生成密钥库、证书和私钥(1)。该对象引用了在前一步中创建的 ClusterIssuer(2)。用于通信的 Kubernetes Service 的名称是 secure-callme-bundle,因此证书的 CN 需要具有该名称。为了启用证书轮换,我们需要设置有效期。最低可能值是 1 小时(4)。因此,每次在过期前 5 分钟,“cert-manager” 将自动更新证书(5)。但是,它不会轮换私钥。
secure-callme-bundle/k8s/cert.yaml
apiVersion: cert-manager.io/v1
kind: Certificate
metadata:
  name: secure-callme-cert
spec:
  keystores:
    jks:
      passwordSecretRef:
        name: jks-password-secret
        key: password
      create: true
  issuerRef:
    name: ss-cluster-issuer
    group: cert-manager.io
    kind: ClusterIssuer
  privateKey:
    algorithm: ECDSA
    size: 256
  dnsNames:
    - secure-callme-bundle
    - localhost
  secretName: secure-callme-cert
  commonName: secure-callme-bundle
  duration: 1h
renewBefore: 5m创建证书后,我们可以继续进行 secure-callme-bundle 应用程序的部署。它将 Secret 挂载为卷,其中包含证书和密钥库。输出 Secret 的名称由 Certificate 对象中定义的 spec.secretName 的值确定。我们需要将一些环境变量注入到 Spring Boot 应用程序中。它需要密钥库的密码(PASSWORD)、Pod 内挂载的受信任材料的位置(CERT_PATH)以及激活 prod 配置文件(SPRING_PROFILES_ACTIVE)。
secure-callme-bundle/k8s/deployment.yaml
apiVersion: apps/v1
kind: Deployment
metadata:
  name: secure-callme-bundle
spec:
  selector:
    matchLabels:
      app.kubernetes.io/name: secure-callme-bundle
  template:
    metadata:
      labels:
        app.kubernetes.io/name: secure-callme-bundle
    spec:
      containers:
      - image: piomin/secure-callme-bundle
        name: secure-callme-bundle
        ports:
        - containerPort: 8443
          name: https
        env:
        - name: PASSWORD
          valueFrom:
            secretKeyRef:
              key: password
              name: jks-password-secret
        - name: CERT_PATH
          value: /opt/secret
        - name: SPRING_PROFILES_ACTIVE
          value: prod
        volumeMounts:
        - mountPath: /opt/secret
          name: cert
      volumes:
      - name: cert
        secret:
          secretName: secure-callme-cert
这是与应用程序相关的 Kubernetes Service:
apiVersion: v1
kind: Service
metadata:
  labels:
    app.kubernetes.io/name: secure-callme-bundle
  name: secure-callme-bundle
spec:
  ports:
  - name: https
    port: 8443
    targetPort: 8443
  selector:
    app.kubernetes.io/name: secure-callme-bundle
  type: ClusterIP
首先,确保你处于 secure-callme-bundle 目录内。让我们使用 Skaffold 在 Kubernetes 上构建并运行该应用,并在 8443 端口下启用“端口转发”:
$ skaffold dev --port-forwardSkaffold 不仅会运行该应用,还会应用应用程序 k8s 目录中定义的所有必需的 Kubernetes 对象。它还适用于“cert-manager”的 Certificate 对象。一旦 skaffold dev 命令成功完成,我们就可以通过 http://127.0.0.1:8443 地址访问我们的 HTTP 端点。

让我们调用 GET /callme 端点。尽管我们启用了 --insecure 选项,但请求失败,因为 Web 服务器需要客户端认证。为了避免这种情况,我们应该在 curl 命令中包含密钥和证书文件。然而,
$ curl https://localhost:8443/callme --insecure -v
*   Trying [::1]:8443...
* Connected to localhost (::1) port 8443
* ALPN: curl offers h2,http/1.1
* (304) (OUT), TLS handshake, Client hello (1):
* (304) (IN), TLS handshake, Server hello (2):
* (304) (IN), TLS handshake, Unknown (8):
* (304) (IN), TLS handshake, Request CERT (13):
* (304) (IN), TLS handshake, Certificate (11):
* (304) (IN), TLS handshake, CERT verify (15):
* (304) (IN), TLS handshake, Finished (20):
* (304) (OUT), TLS handshake, Certificate (11):
* (304) (OUT), TLS handshake, Finished (20):
* SSL connection using TLSv1.3 / AEAD-AES256-GCM-SHA384
* ALPN: server did not agree on a protocol. Uses default.
* Server certificate:
*  subject: CN=secure-callme-bundle
*  start date: Feb 18 20:13:00 2024 GMT
*  expire date: Feb 18 21:13:00 2024 GMT
*  issuer: CN=secure-callme-bundle
*  SSL certificate verify result: unable to get local issuer certificate (20), continuing anyway.
* using HTTP/1.x
> GET /callme HTTP/1.1
> Host: localhost:8443
> User-Agent: curl/8.4.0
> Accept: */*
>
* LibreSSL SSL_read: LibreSSL/3.3.6: error:1404C412:SSL routines:ST_OK:sslv3 alert bad certificate, errno 0
* Closing connection
curl: (56) LibreSSL SSL_read: LibreSSL/3.3.6: error:1404C412:SSL routines:ST_OK:sslv3 alert bad certificate, errno 0让我们切换到 secure-caller-bundle 应用。这个应用也暴露了一个单一的 HTTP 端点。在这个端点的实现方法内部,我们调用了 secure-callme-bundle 应用暴露的 GET /callme 端点。我们使用 RestTemplate bean 来实现这个调用。
pl.piomin.services.caller.controller.SecureCallerBundleController
@RestController
public class SecureCallerBundleController {

    RestTemplate restTemplate;

    @Value("${client.url}")
    String clientUrl;

    public SecureCallerBundleController(RestTemplate restTemplate) {
        this.restTemplate = restTemplate;
    }

    @GetMapping("/caller")
    public String call() {
        return "I'm `secure-caller`! calling... " +
                restTemplate.getForObject(clientUrl, String.class);
    }
}
这次我们需要在应用设置中定义两个 SSL bundles。服务器 bundle 用于 web 服务器,与之前的应用示例中定义的 bundle 非常相似。客户端 bundle 专门用于 RestTemplate bean。它使用从为服务器端应用程序生成的 Secret 中获取的 keystore 和 truststore。有了这些文件,RestTemplate bean 就可以对 secure-callme-bundle 应用进行身份验证。当然,我们还需要在证书轮换后自动重新加载 SslBundle bean。
server.port: 8443
server.ssl.bundle: server
---
spring.config.activate.on-profile: prod
client.url: https://${HOST}:8443/callme
spring.ssl.bundle.jks:
  server:
    reload-on-update: true
    keystore:
      location: ${CERT_PATH}/keystore.jks
      password: ${PASSWORD}
      type: JKS
  client:
    reload-on-update: true
    keystore:
      location: ${CLIENT_CERT_PATH}/keystore.jks
      password: ${PASSWORD}
      type: JKS
    truststore:
      location: ${CLIENT_CERT_PATH}/truststore.jks
      password: ${PASSWORD}
      type: JKS
Spring Boot 3.1 引入了 bundle 概念,极大简化了对于 Spring REST 客户端(如 RestTemplate 或 WebClient)的 SSL 上下文配置。然而,当前(Spring Boot 3.2.2)尚未内置重新加载例如 Spring RestTemplate 的 SslBundle 更新的实现。因此,我们需要添加一部分代码来实现这一点。幸运的是,SslBundles 允许我们定义一个自定义处理程序,该处理程序在 bundle 更新事件上触发。我们需要为客户端 bundle 定义处理程序。一旦它接收到 SslBundle 的旋转版本,它将使用 RestTemplateBuilder 将上下文中的现有 RestTemplate bean 替换为新的。
@SpringBootApplication
public class SecureCallerBundle {
private static final Logger LOG = LoggerFactory.getLogger(SecureCallerBundle.class);
public static void main(String[] args) {
SpringApplication.run(SecureCallerBundle.class, args);
}
@Autowired
ApplicationContext context;
@Bean("restTemplate")
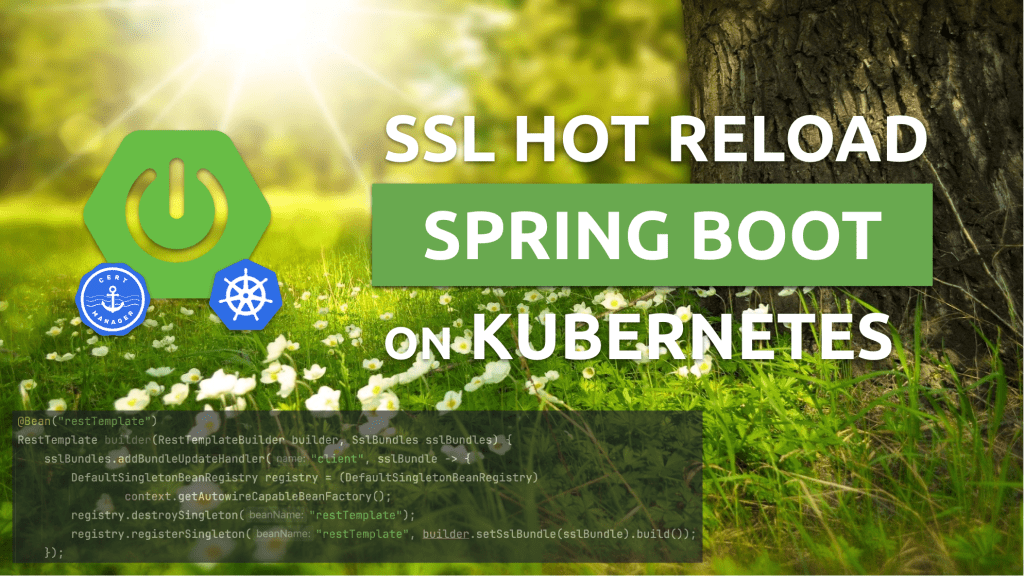
RestTemplate builder(RestTemplateBuilder builder, SslBundles sslBundles) {
sslBundles.addBundleUpdateHandler("client", sslBundle -> {
try {
LOG.info("Bundle updated: " + sslBundle.getStores().getKeyStore().getCertificate("certificate"));
} catch (KeyStoreException e) {
LOG.error("Error on getting certificate", e);
}
DefaultSingletonBeanRegistry registry = (DefaultSingletonBeanRegistry) context.getAutowireCapableBeanFactory();
registry.destroySingleton("restTemplate");
registry.registerSingleton("restTemplate", builder.setSslBundle(sslBundle).build());
});
return builder.setSslBundle(sslBundles.getBundle("client")).build();
}
}让我们看一下当前应用的 Kubernetes 部署清单。这次,我们将两个 Secret 挂载为卷。第一个是为当前应用的 Web 服务器生成的,而第二个是为 secure-callme-bundle 应用程序生成的,由 RestTemplate 在建立安全通信时使用。我们还设置了目标服务的地址,以便将其注入到应用程序中(HOST),并激活了 prod 环境配置文件(SPRING_PROFILES_ACTIVE)。
apiVersion: apps/v1
kind: Deployment
metadata:
  name: secure-caller-bundle
spec:
  selector:
    matchLabels:
      app.kubernetes.io/name: secure-caller-bundle
  template:
    metadata:
      labels:
        app.kubernetes.io/name: secure-caller-bundle
    spec:
      containers:
      - image: piomin/secure-caller-bundle
        name: secure-caller-bundle
        ports:
        - containerPort: 8443
          name: https
        env:
        - name: PASSWORD
          valueFrom:
            secretKeyRef:
              key: password
              name: jks-password-secret
        - name: CERT_PATH
          value: /opt/secret
        - name: CLIENT_CERT_PATH
          value: /opt/client-secret
        - name: HOST
          value: secure-callme-bundle
        - name: SPRING_PROFILES_ACTIVE
          value: prod
        volumeMounts:
        - mountPath: /opt/secret
          name: cert
        - mountPath: /opt/client-secret
          name: client-cert
      volumes:
      - name: cert
        secret:
          secretName: secure-caller-cert
      - name: client-cert
        secret:
          secretName: secure-callme-cert
让我们使用 skaffold dev --port-forward 命令部署该应用程序。再次,它将在 Kubernetes 上部署所有必需的内容。由于我们已经使用“port-forward”选项暴露了 secure-callme-bundle 应用程序,因此当前应用程序暴露在 8444 端口下。

让我们尝试调用 GET /caller 端点。在底层,它使用 RestTemplate 调用了 secure-callme-bundle 应用程序暴露的端点。如您所见,安全通信已成功建立。
curl https://localhost:8444/caller --insecure -v
*   Trying [::1]:8444...
* Connected to localhost (::1) port 8444
* ALPN: curl offers h2,http/1.1
* (304) (OUT), TLS handshake, Client hello (1):
* (304) (IN), TLS handshake, Server hello (2):
* (304) (IN), TLS handshake, Unknown (8):
* (304) (IN), TLS handshake, Certificate (11):
* (304) (IN), TLS handshake, CERT verify (15):
* (304) (IN), TLS handshake, Finished (20):
* (304) (OUT), TLS handshake, Finished (20):
* SSL connection using TLSv1.3 / AEAD-AES256-GCM-SHA384
* ALPN: server did not agree on a protocol. Uses default.
* Server certificate:
*  subject: CN=secure-caller-bundle
*  start date: Feb 18 20:40:11 2024 GMT
*  expire date: Feb 18 21:40:11 2024 GMT
*  issuer: CN=secure-caller-bundle
*  SSL certificate verify result: unable to get local issuer certificate (20), continuing anyway.
* using HTTP/1.x
> GET /caller HTTP/1.1
> Host: localhost:8444
> User-Agent: curl/8.4.0
> Accept: */*
>
< HTTP/1.1 200
< Content-Type: text/plain;charset=UTF-8
< Content-Length: 57
< Date: Sun, 18 Feb 2024 21:26:42 GMT
<
* Connection #0 to host localhost left intact
I'm `secure-caller`! calling... I'm secure-callme-bundle!
现在,我们可以等待一个小时,直到 "cert-manager" 旋转 secure-callme-cert 密钥。然而,我们也可以删除该密钥,因为 "cert-manager" 将基于 Certificate 对象重新生成它。这是用于在我们的两个示例 Spring Boot 应用程序之间建立安全通信的证书和密钥存储的 secret。

无论您等待 1 小时直到轮换发生,还是通过删除密钥手动执行,您都应该在 secure-callme-bundle 应用程序的 pod 中看到以下日志。这意味着 Spring Boot 已接收到 SslBundle 更新事件,然后重新加载了 Tomcat 服务器。

secure-callme-bundle 应用程序也处理了 SslBundle 事件。它会刷新 RestTemplate bean,并在日志中打印带有最新证书的信息。

Spring Boot 的最新版本极大地简化了服务器和客户端 SSL 证书的管理。借助 SslBundles,我们可以在 Kubernetes 上轻松处理证书轮换过程,而无需重新启动 pod。本文未涵盖的还有一些其他事项需要考虑,包括跨应用程序分发信任捆绑包的机制。但是,例如,在 Kubernetes 环境中管理信任捆绑包,我们可以使用“cert-manager”的 trust-manager 功能。